Per-pixel Alpha Blending in Win32 Desktop Applications
It took a bit of research and experimenting, but I was able to correctly achieve per-pixel alpha blending in Windows desktop applications. In addition to having tested it on Windows XP SP3 and Windows 7, the code also detects failure in the alpha blend and will fall back to the chroma keying method instead (which seems to be necessary for Remote Desktop support).
Example of Per-Pixel Alpha Blending in Windows 7:

Preparing The Image
For this example, I've prepared an image with some text on a colorful, pixelated background.
Color
![]()
Alpha
![]()
Seeing the alpha channel, it should be apparent that the magenta regions of the color image will actually be unseen when drawn to screen. Theoretically I could have chosen any other color for those regions; however, the code below also must be able to resort to simple chroma keying if necessary, in which case magenta is often used for it's lack of occurrence "in the wild".
Though shown separately, each were combined and exported to a single BMP (Windows Bitmap) file from Photoshop CS4. Originally I hoped I could craft my image using typical Photoshop practices, however this proved unacceptable during export. I have no idea why, but Photoshop would not export transparency layers to BMP and still preserve color and alpha properly. Instead, it was flattening my layer to a white matte, and exporting a 24-bit BMP with no alpha channel.
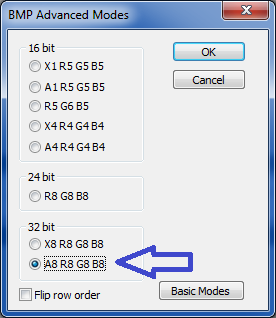
So, in order to export correctly from Photoshop, I needed (once satisfied with the transparency look and feel) to edit in a Custom Channel (which I named "Alpha"), and remove the transparency from my primary channels' layer altogether. Once this is done, you will see the BMP option to export alpha channel, and can choose a 32-bit format along the way.

The Essential Code
Create your window instance using WS_EX_LAYERED. This instructs Windows to treat your graphics output differently. In particular, this causes Windows to hold an additional buffer for your graphics output (I believe), and causes Windows to render your graphics output with chroma keying or alpha blending enabled.
//////
// Win32 setup

// create the window class
WNDCLASSEX wcex;
wcex.cbSize = sizeof(WNDCLASSEX);
wcex.style = CS_HREDRAW | CS_VREDRAW;
wcex.lpfnWndProc = WndProc;
wcex.cbClsExtra = 0;
wcex.cbWndExtra = 0;
wcex.hInstance = hInstance;
wcex.hIcon = LoadIcon(NULL, IDI_APPLICATION);
wcex.hCursor = LoadCursor(NULL, IDC_ARROW);
wcex.hbrBackground = (HBRUSH)GetStockObject(BLACK_BRUSH);
wcex.lpszMenuName = NULL;
wcex.lpszClassName = TEXT("Splash");
wcex.hIconSm = LoadIcon(NULL, IDI_APPLICATION);
RegisterClassEx(&wcex);

// create the window instance
hWnd = CreateWindowEx(
	WS_EX_LAYERED, // <---- !!!!!
	TEXT("Splash"),
	TEXT("Splash"),
	WS_POPUP,
	x,
	y,
	g_iSplashImageWidth,
	g_iSplashImageHeight,
	NULL,
	NULL,
	hInstance,
	NULL
);
Next, you must ensure your pixel colors have been premultiplied against their respective alpha values. This is a requirement of the Win32 API in order to achieve the proper and intended results. In my case, I was not able to export from Photoshop a proper 32-bit BMP file with premultiplied alpha, so I perform this at load time. If you run an off-line tool or otherwise have premultiplied pixels, then it is not necessary to perform this step. To see an example of pre-multiplying, see the downloadable source code attached to this post.
With our image pixels premultiplied, we are now ready to render to the Windows display.
//////
// WNDPROC

LRESULT CALLBACK WndProc(HWND hWnd, UINT message, WPARAM wParam, LPARAM lParam)
{
	switch (message)
	{
	case WM_CREATE:
		if(g_bUsePerPixelAlpha)
		{
			// try the per pixel method
			bool bPaintSuccess = Paint(0, 0, hWnd);


	// ...
}


//////
// Specialized Paint method
bool Paint(HDC hdc, PAINTSTRUCT* ps, HWND hWnd)
{
	// ...


	// setup a "back buffer" to be same pixel
	// format as the screen DC and same dimensions
	// as source image.
	HDC hdcScreen = GetDC(NULL);
	HDC hdcBackBuffer = CreateCompatibleDC(hdcScreen);
	HBITMAP hbmBackBuffer = CreateCompatibleBitmap(hdcScreen, g_iSplashImageWidth, g_iSplashImageHeight);
	HGDIOBJ hbmOld = SelectObject(hdcBackBuffer, hbmBackBuffer);

	// copy source image to backbuffer
	SetDIBitsToDevice(
		hdcBackBuffer,
		0,
		0,
		g_iSplashImageWidth,
		g_iSplashImageHeight,
		0,
		0,
		0,
		g_iSplashImageHeight,
		g_pSplashImagePixels,
		reinterpret_cast<BITMAPINFO*>(g_pbmiSplashImage),
		0
	);

	// inform Windows that we have new graphics data available.
	POINT ptSrc;
	ptSrc.x = 0;
	ptSrc.y = 0;
	SIZE size;
	size.cx = g_iSplashImageWidth;
	size.cy = g_iSplashImageHeight;
	BLENDFUNCTION bf;
	bf.AlphaFormat = AC_SRC_ALPHA;
	bf.SourceConstantAlpha = 255;
	bf.BlendFlags = 0;
	bf.BlendOp = AC_SRC_OVER;
	if(!UpdateLayeredWindow(hWnd, NULL, NULL, &size, hdcBackBuffer, &ptSrc, 0, &bf, ULW_ALPHA))
	{
		SelectObject(hdcBackBuffer, hbmOld);
		DeleteDC(hdcBackBuffer);
		return false;
	}

	SelectObject(hdcBackBuffer, hbmOld);
	DeleteDC(hdcBackBuffer);
	return true;
}
Can this method fail? Yes. In particular, it seems this method is not supported under Remote Desktop connections, and infact will fail immediately but yield no specific error code from GetLastError(). The source code provided will respond to this failure and fall back to a chroma keying method that is supported (as far as I have seen) under Remote Desktop connections.
if(!bPaintSuccess)
{ // per pixel failed
	// switch to chroma key method.
	g_bUsePerPixelAlpha = false;
	SetLayeredWindowAttributes(hWnd, CHROMA_KEY, 255, LWA_COLORKEY);
}
Epilogue: UpdateLayeredWindow vs. SetLayeredWindowAttributes
Lastly, there are some important differences between UpdateLayeredWindow() and SetLayeredWindowAttributes(). Once you create your window with WS_EX_LAYERED, you have two options:
I. Do nothing else:
- Allows the full range of blend effects -- opaque, uniform transparency, chroma-keying, and per-pixel alpha.
- WM_PAINT messages are no longer fired -- you must initiate and perform the rendering of your window yourself.
or II. Call SetLayeredWindowAttributes():
- Allows opaque, uniform transparency, and chroma-keying blend effects. Per-pixel alpha is not possible.
- WM_PAINT messages continue to fire as normal.
Source Code & Acknowledgments
The full source is available here, AlphaBlending.zip (103.07 kb), and includes the photoshop file and exported BMP.
The following posts were helpful in my quest:
- http://www.autohotkey.com/forum/topic24628.html&sid=b09d522553d07c4ae0a834fc21239635
- http://www.gamedev.net/community/forums/topic.asp?topic_id=449081&whichpage=1�
- http://msdn.microsoft.com/en-us/library/ms997507.aspx
